

The desk that debugged itself
How I built a whole desk system by describing it to Claude — and let its own failures redesign it.
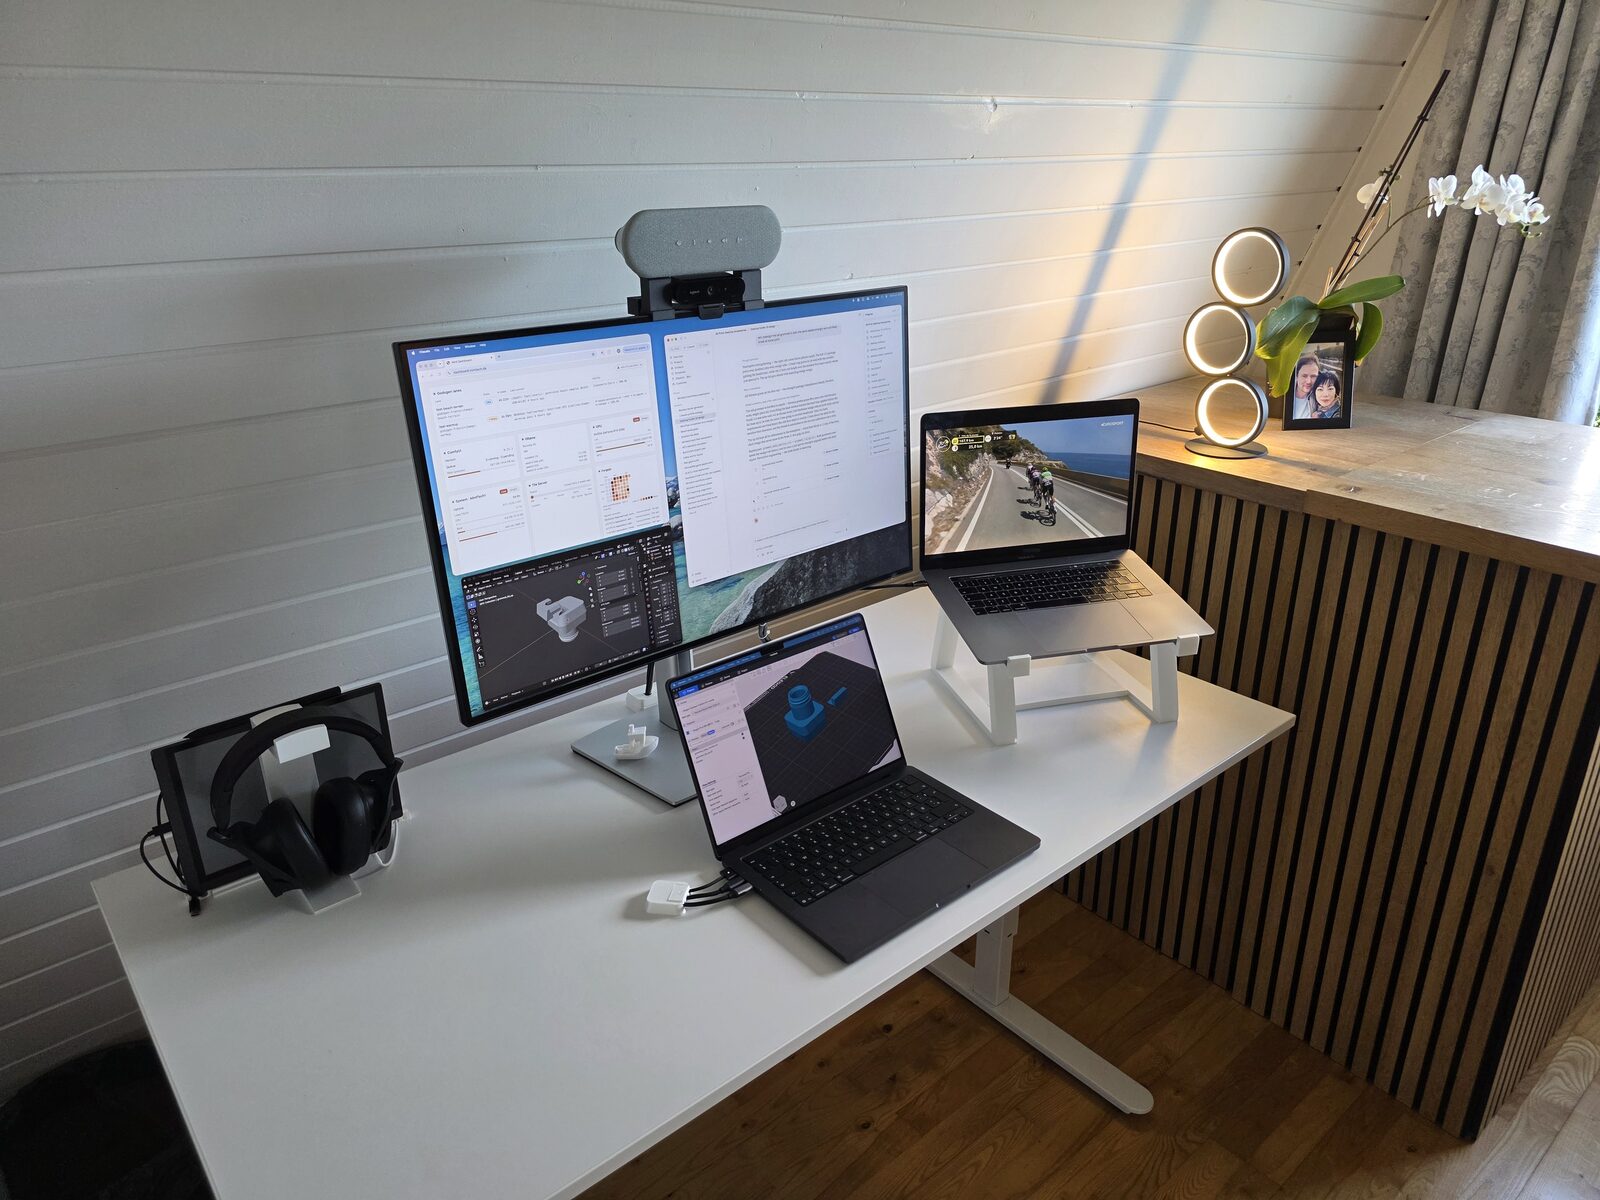
I set out this weekend to do something small: tidy the tangle of cables and devices cluttering the top of my desk. I ended up designing and printing eleven custom parts — a cable- and gear-management system built specifically for my desk, my laptop, my hub — barely opening a CAD program.
I know my way around CAD — I could have modelled all of this by hand. That’s exactly why the way I actually built it surprised me: I barely touched a modelling tool. I described what I wanted, and the parts came back designed, checked, and ready to print. That shift — from drawing parts to describing them — is really what this post is about.
What “designing by conversation” actually looked like
I described what I wanted in plain language — “a through-desk cable grommet with three lanes and a sliding lid,” “under-desk clamps for a USB hub, 40 mm wide opening, screw flanges,” “a riser for my speaker with legs I can adjust.” Claude — I was using the new Claude Fable 5 model — turned each description into a real, parametric 3D model.
Not a picture of a part. Not a vague STL scraped off the internet. Actual buildable geometry, generated from code, with the dimensions I asked for and the tolerances a printer needs.
And critically, it checked its own work before handing anything over. Every part went through a set of automated probes:
- Watertight check — is the mesh actually a solid a printer can slice?
- Interference / mate check — do the lid and body fit together with zero clash?
- Single-piece check — is the part one connected body, not two that merely look joined? (This one caught a real bug: two lids whose wings were floating 0.15 mm off the plate — a gap invisible to every other test.)
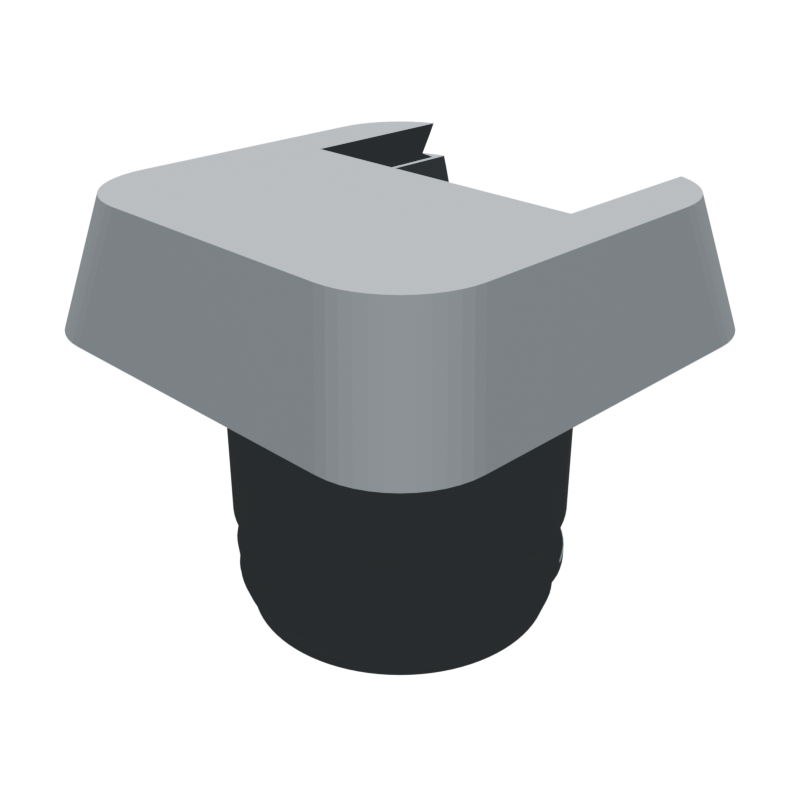
Then it rendered the part in Blender so I could actually see it before committing plastic and an hour of print time. Describe → generate → verify → preview → print. That loop, running in minutes, is the thing that felt genuinely new.
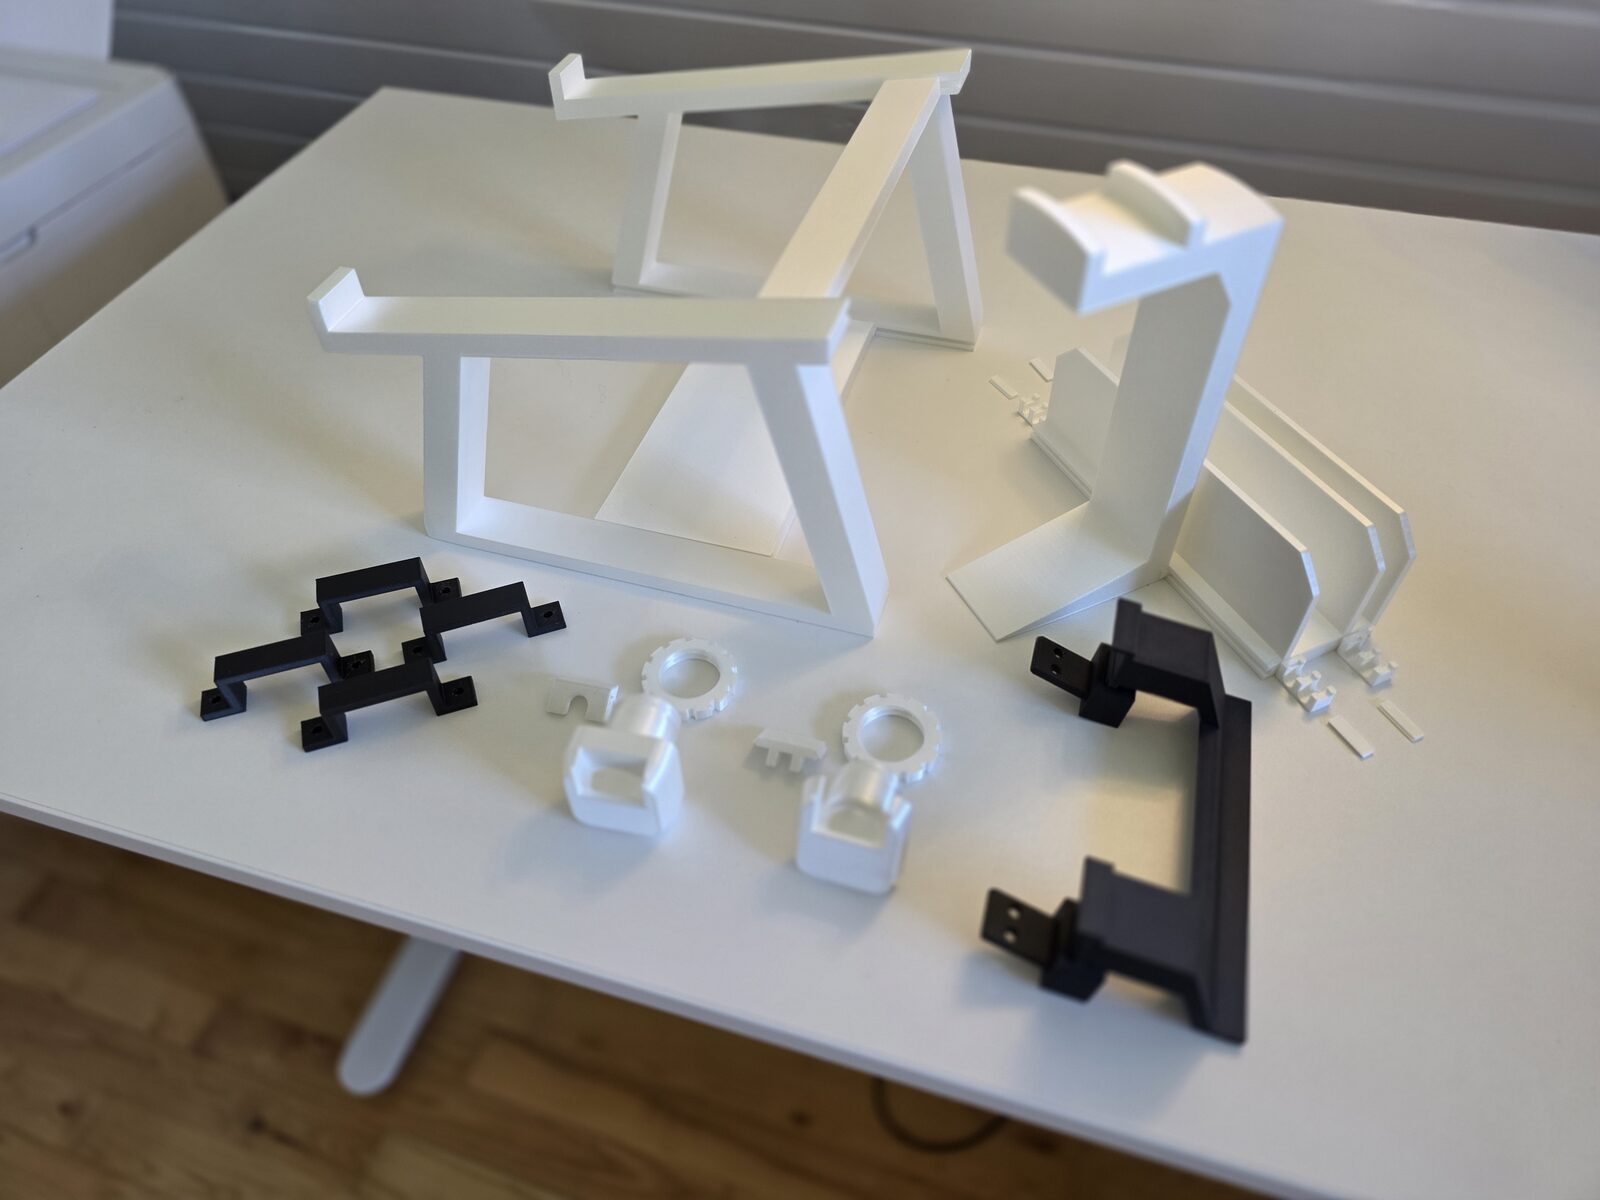
The eleven-part desk family
Because every part was generated from the same parametric system, they could all share one “dovetail language” — a common joint profile, so modules click together and lids slide into bodies with the same motion everywhere. Over the weekend that grew into:
- A cable rack with swappable modules and plugs
- An A-frame laptop riser
- Mini cable holders (2-gram bars, printed in any spare corner of the bed)
- A speaker perch with strap-hole legs that double as a cable anchor
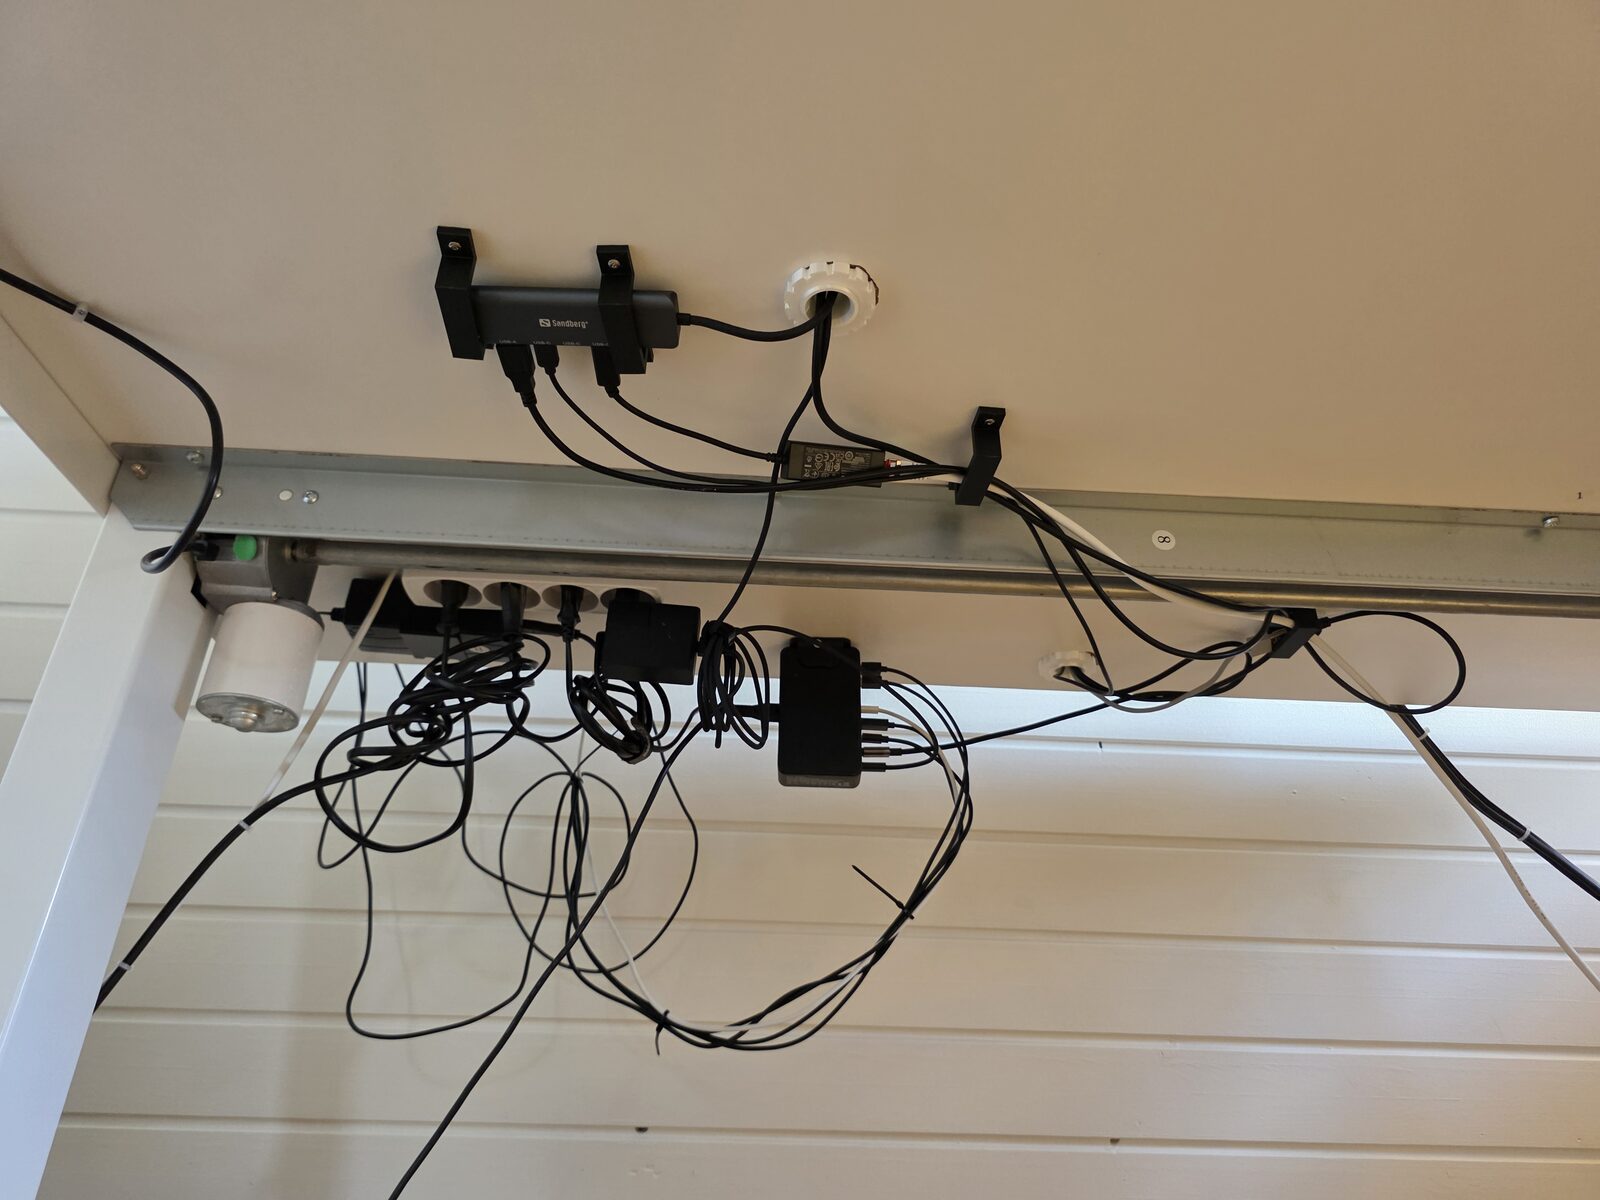
- Under-desk clamps to hold a USB hub captive against the tabletop
- Two through-desk grommets with three interchangeable lids between them — a “comb” lid for cables running along the desk, a closed “U-slot” lid for cables running straight up to the monitor
The part that broke — and why it’s the best part of the story
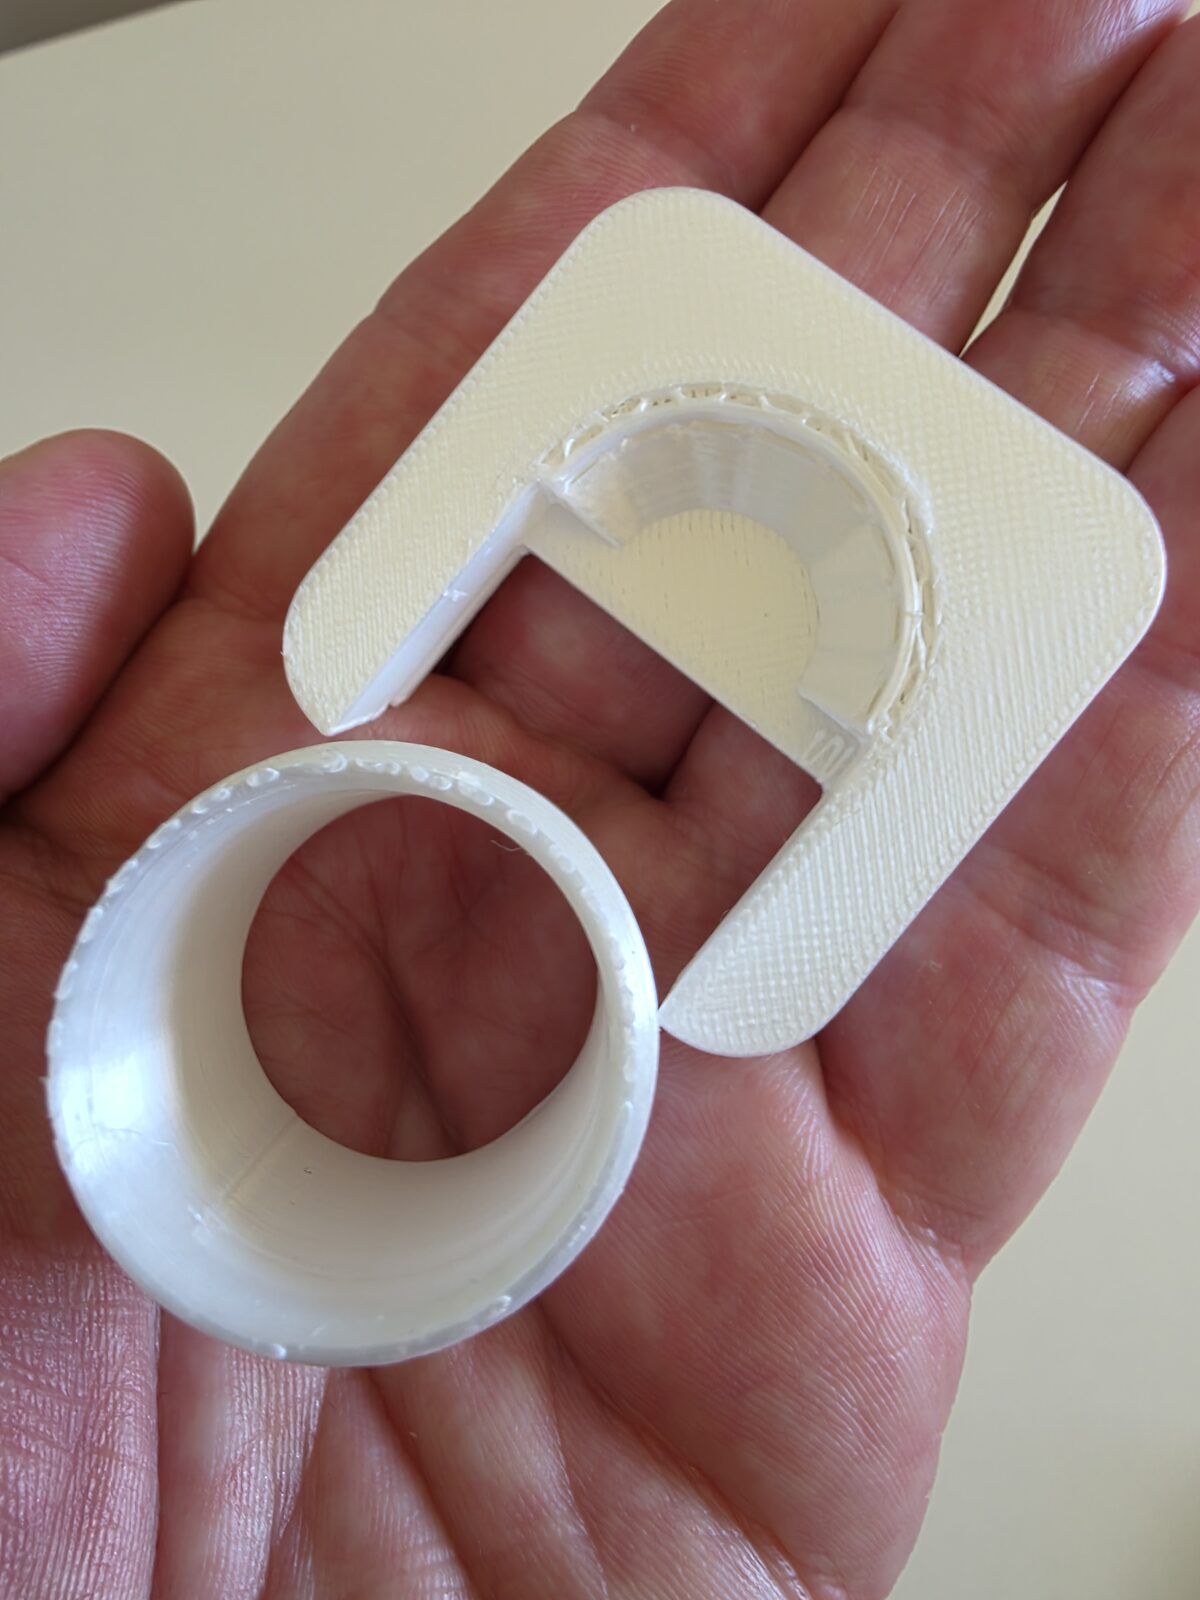
Here’s where it got interesting. I printed the first grommet, went to click the lid on, and it cracked in my hand.
If the story were “AI made me a perfect thing,” this is where it would fall apart. Instead it’s where it got good.
We looked at why it broke. The tube wall was only 2.7 mm — and at the thread roots, where the material is cut away for the screw-on nut, it thinned to just 1.3 mm. Torquing the cap while pushing the lid in was exactly the load that wall couldn’t take. Obvious in hindsight; invisible until a real part met a real hand.
So we redesigned around the failure:
- Doubled the tube wall — 2.7 → 5.4 mm, and 4.0 mm even at the thread roots. Roughly 8× stronger in the twist-while-pushing case that killed it. The outer diameter and thread stayed identical, so the nut I’d already calibrated still fit.
- Reinvented the rail. The lid used to slide on a thin 1.3 mm flat wing — a shelf just begging to snap. It became a full-thickness triangular wedge: the lid’s whole edge is the rail, sliding under a matching wedge in the wall. There is no thin feature left to break, and it self-centres as it seats. The act that broke version one — attaching the lid — is now the gentlest thing you can do to the part.
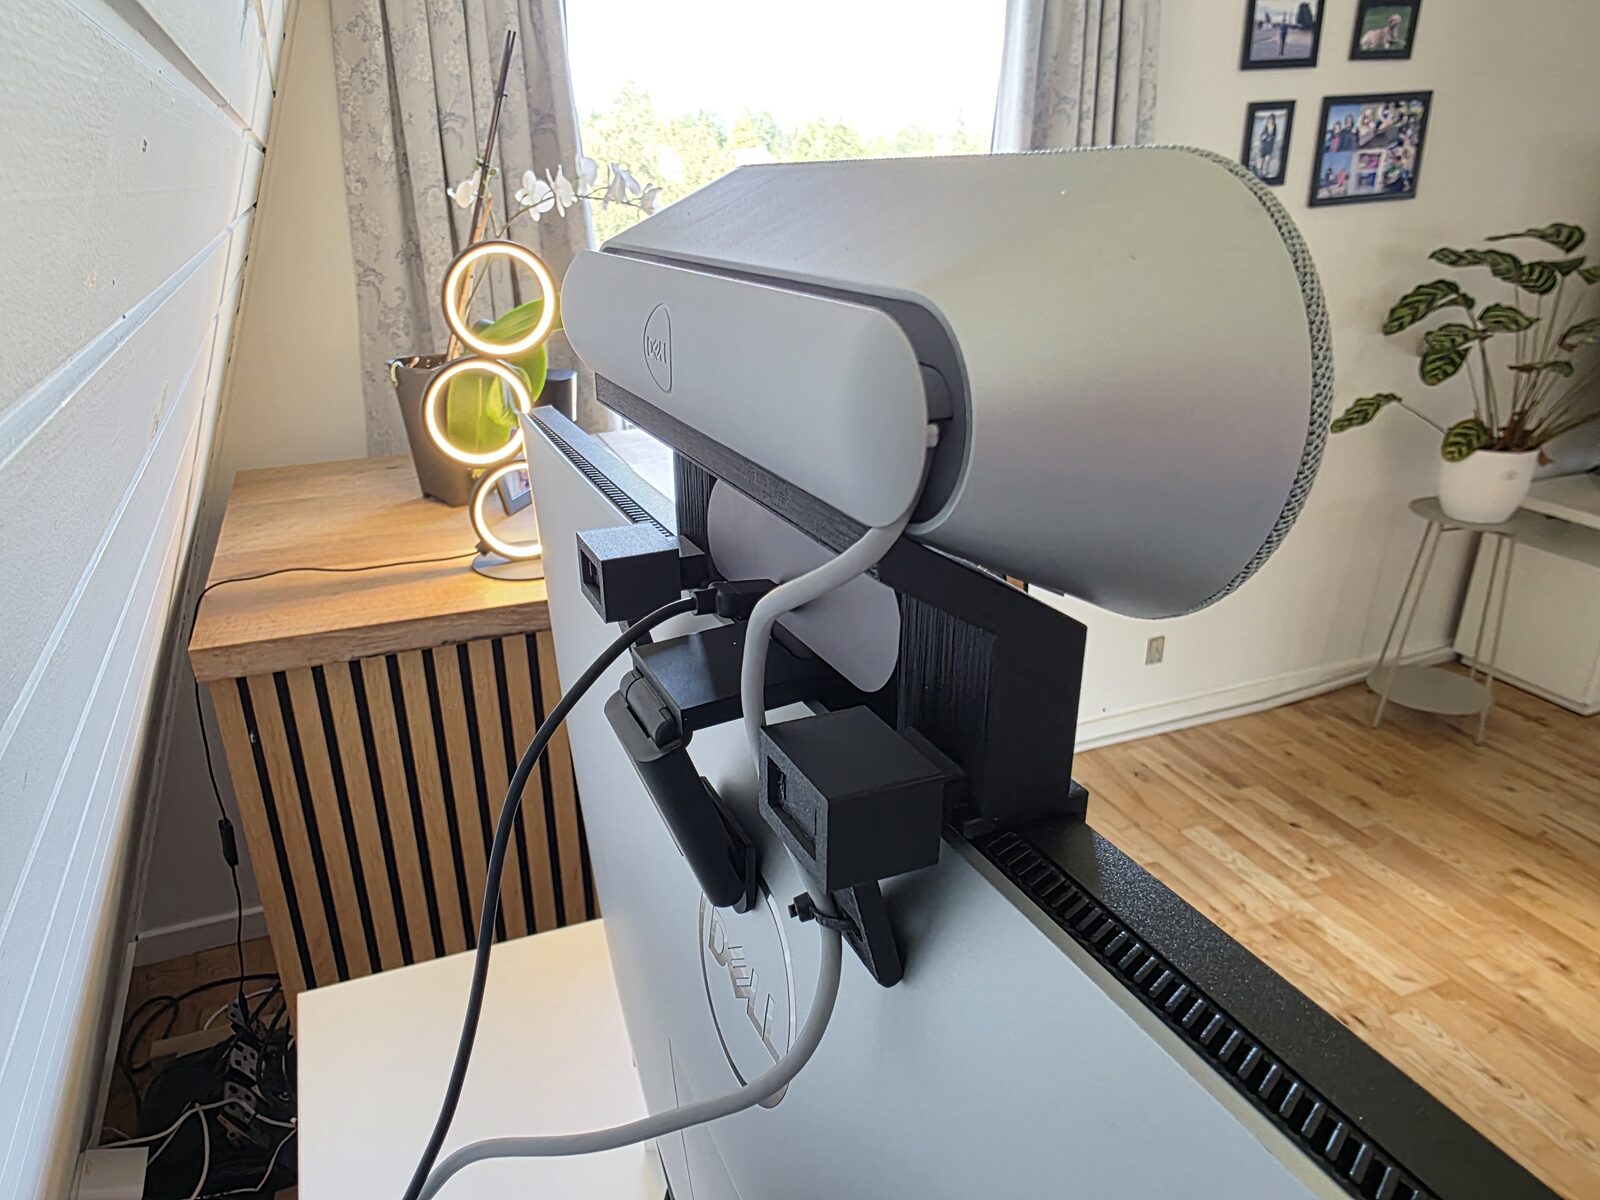
Then I did something I wouldn’t have bothered with if this were slow, expensive CAD work: I asked it to pre-emptively rebuild the second grommet with the same strength package, before it broke. Same failure physics, so fix it in advance. When iteration is this cheap, “engineer it before it fails” stops being a luxury.
Why this is a real capability leap, not a party trick
I’ve watched AI write text and generate images for a while now. This felt different in kind. The output wasn’t words about a part — it was the part: dimensioned, verified, manufacturable, and sitting on my desk an hour later.
A few honest caveats, because they matter:
- My hands were still the real test. No simulation told me the grommet would crack; a real print and a real assembly did. The physical world remains the toughest probe in the pipeline.
- The judgment was mine. What to build, what “strong enough” means, which trade-offs to accept (a thicker wall costs bore diameter; a taller base costs headroom) — those were my calls. The model was extraordinarily good at execution and at explaining the trade-offs, but I was still the engineer.
- It’s iterative, not oracular. The good result came from four rounds on that rail, each one better than the last — not one perfect shot.
But the headline stands: I can model this stuff by hand, and drawing eleven parts, dialling in the tolerances, and catching a 0.15 mm gap by eye would have eaten most of the weekend. Describing them instead — and letting the model handle the geometry, the checks, and the trade-off maths — turned that into an afternoon. When you already know how long the manual path takes, the shortcut is hard to overstate.
The cables are tidy now. But the part I keep thinking about is the broken one — because the fixing of it is what convinced me this is real.
Full disclosure: the cable mess is still there. It just lives under the desk now, where I can’t see it. I’m counting that as a win.
Print it yourself
Every part is up as a free collection — The Desk That Debugged Itself (CC BY-NC, for personal use) — with print notes on each model. The grommet has a printed thread, so print the little grommet_thread_test first to dial in the fit.
- MakerWorld → The Desk That Debugged Itself
- Printables → The Desk That Debugged Itself
If you print one, I’d love to see it.
Built over a weekend with Claude Fable 5 and a 3D printer. Every part parametric, verified, and — eventually — unbreakable.